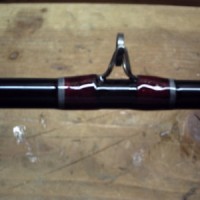
 The guides, hook keeper and tip top are all wrapped with thread, so it is time to start the final part of the rod build – applying a color preservative typically referred to as color lock and then the epoxy.
Key to this step will be the use of a rod turner, which can be purchased for around $30 on Ebay. It turns at a low 6 RPM, which allows you to apply the color lock or epoxy without touching the rod, and ensures that the coats will be somewhat even as they dry.
I place the rod in the turner and apply two coats of color lock, waiting an hour or more between coats. After the last coat of color lock dries, I apply two coats of epoxy, waiting 24 hours between each coat.
As I write this, the rod is in the basement turning while the second coat of epoxy dries. By morning, the epoxy should be dry, but as an added measure of safety, I’ll let it set for an extra day.
Can’t wait to try it out.
To see Parts 1 and 2 click the links below.

Leave a Reply